Welcome to Moda Fabrics!
Stitch Pink 2021 - Part 5
Stitch Pink 2021 - Part 5
Published:
Nov 4 2021 - 06:40
We’ve arrived and the final part for the sew along—congratulations!
Today I’ll share how to set your quilt together. And you’ll also be able to see my finished Together Wall Hanging quilt which uses one of each of the five different block styles along with four alternate blocks. The wall hanging is a terrific option if you want to make a smaller version of the Together quilt—you may even want to make both.
Quilt Assembly
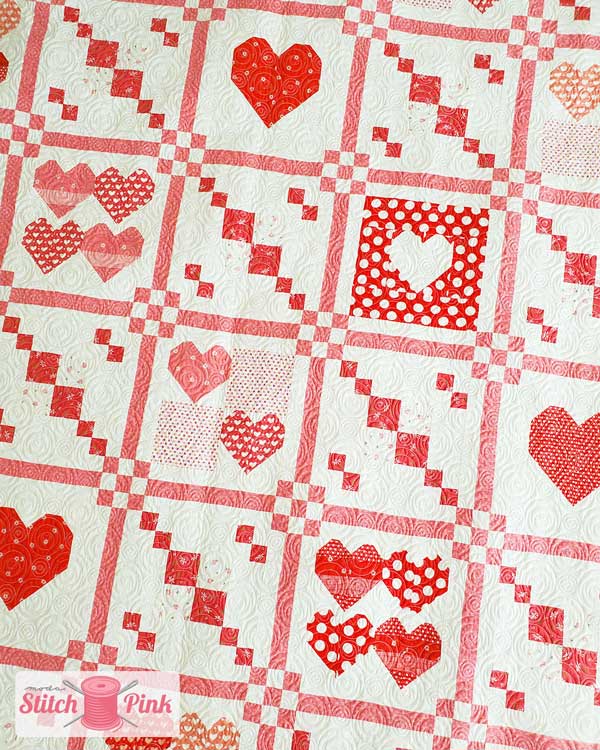
Find quilt assembly instructions and diagrams on pages 11-12 of your pattern.
Extra Tips for Quilt Assembly
- If you’re using your own fabrics or have changed up some of the prints, I suggest you lay out the entire quilt before sewing it together.
- Post and Sashing rows begin and end with a 9-Patch post unit.
- Block rows begin and end with a sashing unit.
- Measure your quilt for side and top and bottom borders before cutting those border pieces.
- You can easily make this quilt larger by adding an additional border to the quilt. Use your favorite print for this border.
Stitch Pink 2021 - Part 5 Video
The Together Wall Hanging Quilt
With my extra blocks and bits and pieces from filming the videos I realized that I could make a fun wall hanging version of this quilt.
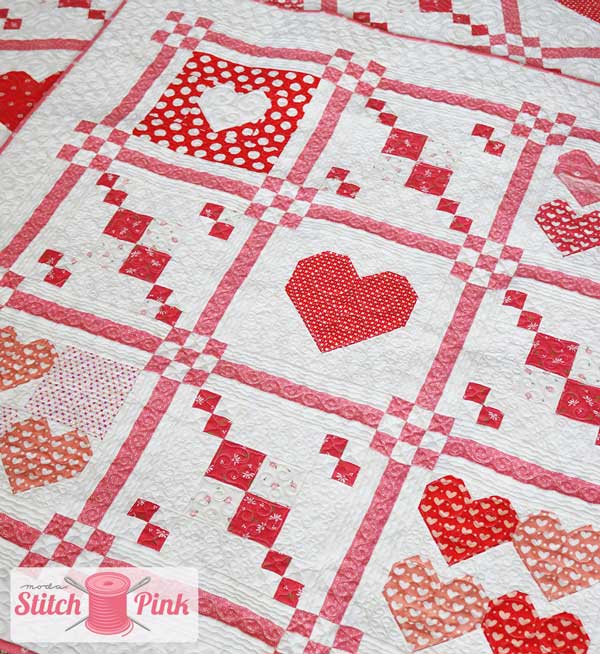
This wall hanging finishes at 42 ½” x 42 ½”. Download the PDF instructions for the wall hanging here. (Together pattern is still needed for cutting information).
Thanks so much for sewing along... we can't wait to see all of the finished Together Quilts and Wall Hangings.
The videos will be available for your to re-watch as needed, and you can find all of the previous posts in this series here.
Posted in: