Welcome to Moda Fabrics!
BH4 - Block 1
BH4 - Block 1
Published:
Mar 23 2022 - 06:40
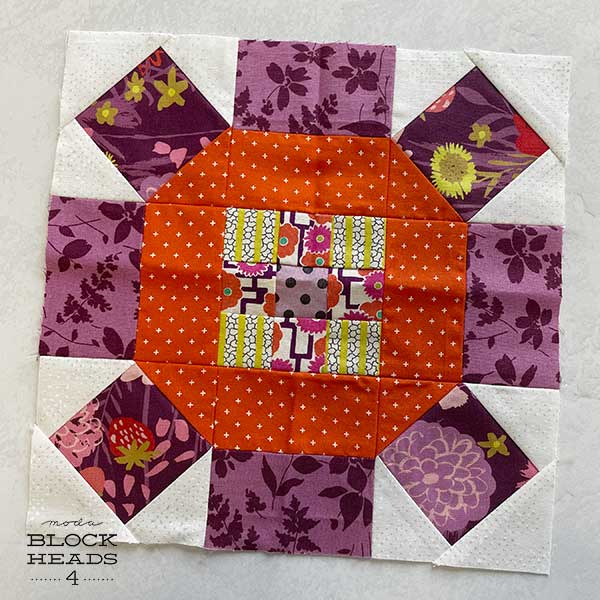
And we're off! We're rolling with Lynne Hagmeier and her Square Wheel.
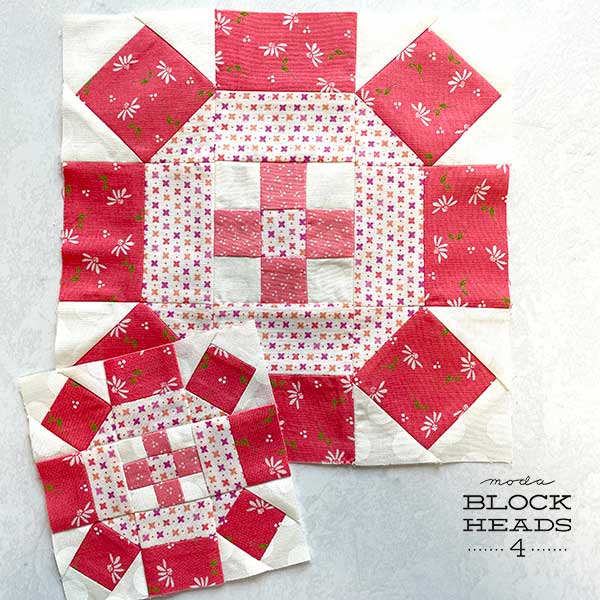
Square Wheel by Moda's Tammy Vonderschmitt - made with Sincerely Yours by Sherri & Chelsi.
Are you excited? First things first, the link to the block instructions can be found on Lynne's blog - Kansas Troubles Quilters.
And here - BH4 Block 1 - Square Wheel.
There have been questions about how to participate, so let's get to that first.
- Blocks via e-mail? Every Wednesday, Moda's Blockheads post will be sent via e-mail Newsletter. We are not able to add you to the e-mail list. To be added, you need to sign up here - Moda Blog Newsletter.
- Don't want the e-mail? Bookmark one of these two links and check back every Wednesday morning after 8:00 AM CST. Moda's Resource+Inspiration Center - Blockheads 4 or Blockheads 4 - Archive.
- Moda Blockheads Facebook Group
Now that that's taken care of, there's plenty to share about this new Blockheads adventure. When Round 4 was in the early planning stages, one of the early considerations was how many Designers, and who? Blockheads launched in 2017 with five Moda Designers, and a plus-one. (Yours truly.) We weren't sure how it was all going to work, but we definitely had fun with it. We changed up the quilt for Round 2, and everyone invited a friend, a Moda Designer, with a final total of thirteen Blockheads. Blockheads 3? With so many outside commitments, a few had to skip the party, so a few new faces were invited.
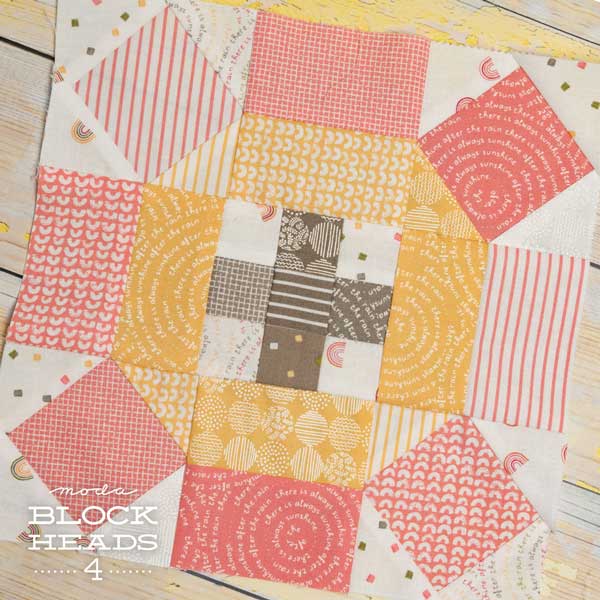
Square Wheel by Moda's Brittany Clark - made with Renew by Sweetwater. She's calling this Strawberry Lemonade, and not using the green in the collection.
So for Blockheads 4, we wanted more. Designers, styles, skill levels... all of it. I could write that this round has a mix of "new and old faces" but oy... old? Let's go with "returning". New and familiar. (Even better.)
When Lynne RSVPd with a YAY, we knew her block would be our lead-off. After all, she is a trailblazer in the quilting industry, and she and Lissa - aka ModaLissa - came up with the idea for Blockheads.
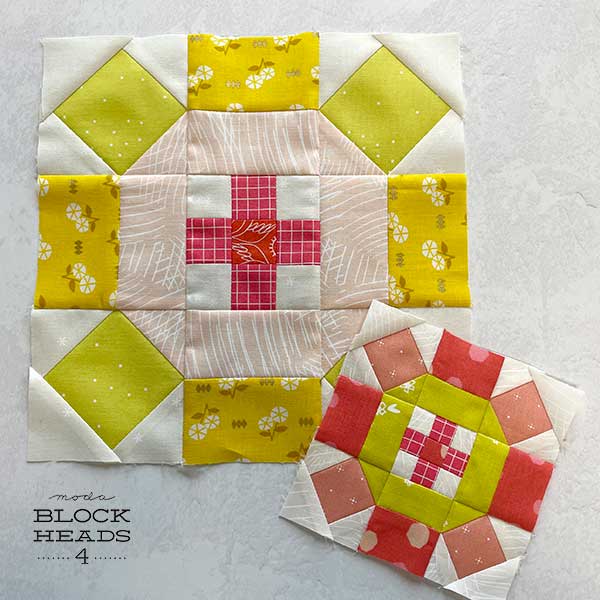
Square Wheel by Moda's Abby Ozment - made using First Light by Ruby Star Society. (With a few Basics mixed in.)
A couple of things to share about Square Wheel, about making square-in-a-square units. For this pattern, they're made with connector corners, also referred to as flip-and-sew corners, and folded corners. The method in the pattern works well, but there are alternatives.
One of our favorite tools is the Simple Folded Corner Ruler by Doug Leko of Antler Quilt Designs. The ruler is similar to others, but we've found this one very easy to use. And it has a few options.

The ruler comes in two sizes - Regular and Mini. The Regular ruler is AQDR1, and it trims squares up to 8½". The Mini is AQDR2, and it trims squares up to 4½". (I use the Mini so I might have two.)
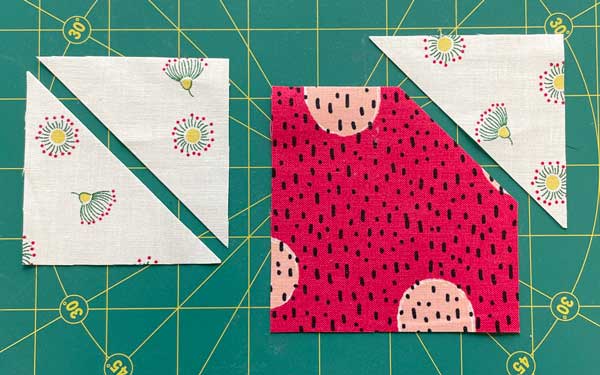
There are two options for how to use the ruler. The first method uses the same size pieces cut in the pattern. (Only the units for the 9" block are shown.)
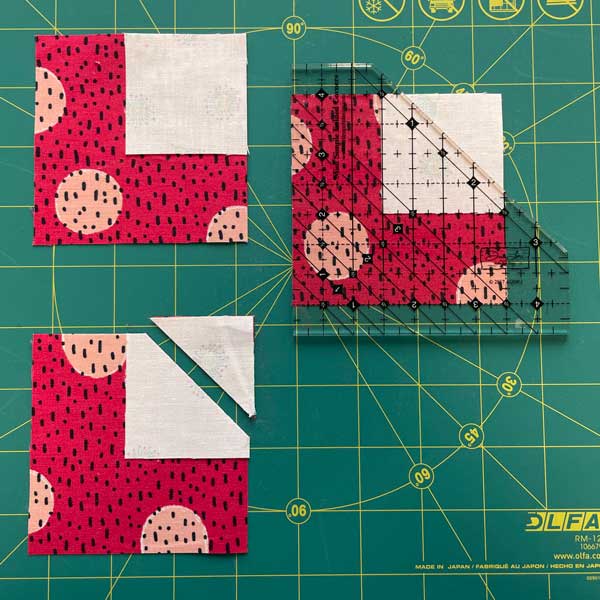
Layer the squares as directed, and use the ruler to trim the triangles before stitching. This allows the seam/piece to be stitched with a scant ¼" seam allowance. Trim, stitch, press, done.
Just be sure that the ruler includes the seam allowance - do not cut from corner to corner.
This ruler also makes it possible to use an over-sized corner triangle, allowing the unit to be trimmed to size after it's been pieced.
Instead of cutting a 2" square for the corner, a larger square is cut, then cut in half as shown. (The cutting sizes are specified in the ruler instructions.)
The most important thing to pay attention to here is the placement of the ruler on the large square. Find the ruler lines for the proper placement using the ruler instructions, or even with the help of a small square. Then mark the ruler lines with washi tape or a Post-It note as shown above. Double-check the markings because "measure twice, cut once" is particularly true here. (And maybe test it on a piece of scrap fabric.)
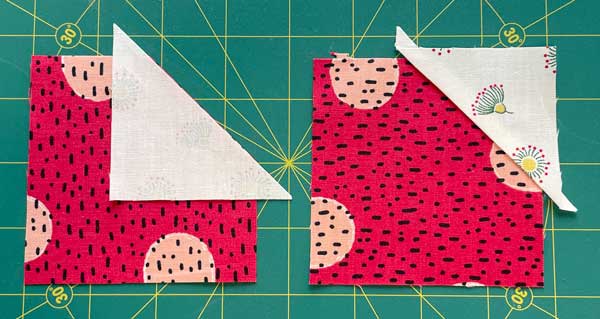
Center the triangle as shown. Stitch with a scant ¼" seam allowance. Press the triangle. Trim the unit to size.
These can be done one corner at a time, or with opposing corners at the same time. Trim the unit square after every corner triangle is added.
Another excellent alternative is the Square-in-A-Square foundation Paper by It's Sew Emma - the 3" Finished and the 1½" Finished.

If you make a lot of square-in-a-square units, these papers can make a big difference in accuracy. (And peace of mind.)
Staying organized! For a project like this, with so many different strips and pieces of different sizes, it's easy to quickly find yourself with a big pile of seemingly random scraps. Creating a system for corralling scraps will help with this - Tammy can help with this! Because she works on so many different projects at a time, including sampler quilts, she saves every scrap, and keeps it organized.
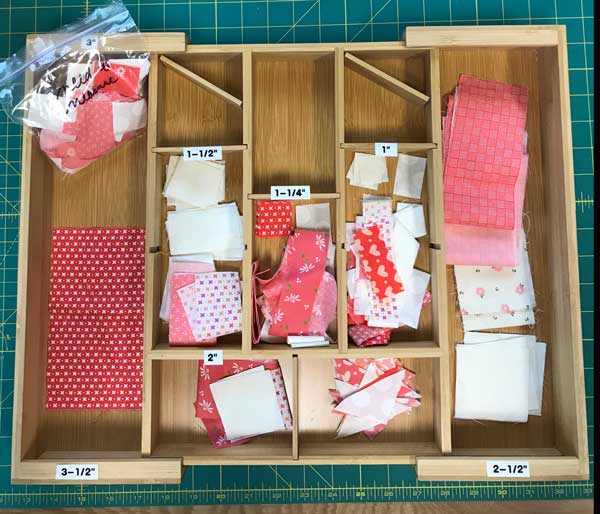
For this project, Tammy used one of the Expandable Bamboo Storage Trays by Lipper - No. 8882. She pulled out a label-maker to make stickers for the tray with different size pieces, and she'll adjust as needed. This comes with six dividers so some of the compartments can be customized for the needed size. Overall, when fully open, it measures 11" wide x 19" wide. We'll share more about her organizing next week.
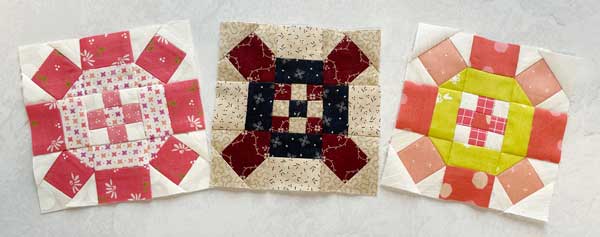
We do love these 4½" blocks - Tammy made a second block using Lynne's Freedom Road collection, and she changed up the fabric placement. Doesn't the block look different?
If you're on social media, be sure to check out #modablockheads to see the blocks everyone is making.
Moda's Blockheads Facebook Group is also excited, and there are so many beautiful fabric pulls to see - Moda Blockheads Facebook Group.
One last block mixing fabrics by Crystal Manning, Jen Kingwell, Brigitte Heitland, Ruby Star Society and Moda's Studio M.
To keep track of all the blog posts, Designer setting options, and other Blockheads-related posts, the best resource is - Blockheads 4 Archive.
We'll be back next week with Block 2 and a Setting Option.
Now go. Sew!
Posted in:
Comments